
Organization Settings
Organization Settings is where you manage your company profile, your broker relationship, and who on your team has access to Inscora. You'll find it under Organization > Settings in the left sidebar.
Everything sits on one page, with a section list down the left side you can use to jump straight to what you need:
- Account details - your organization's profile: name, website, address, and communication language.
- Preferred Broker - the broker assigned to your organization for cyber insurance support.
- Members - the Service Providers on your team, their roles, and invitations.
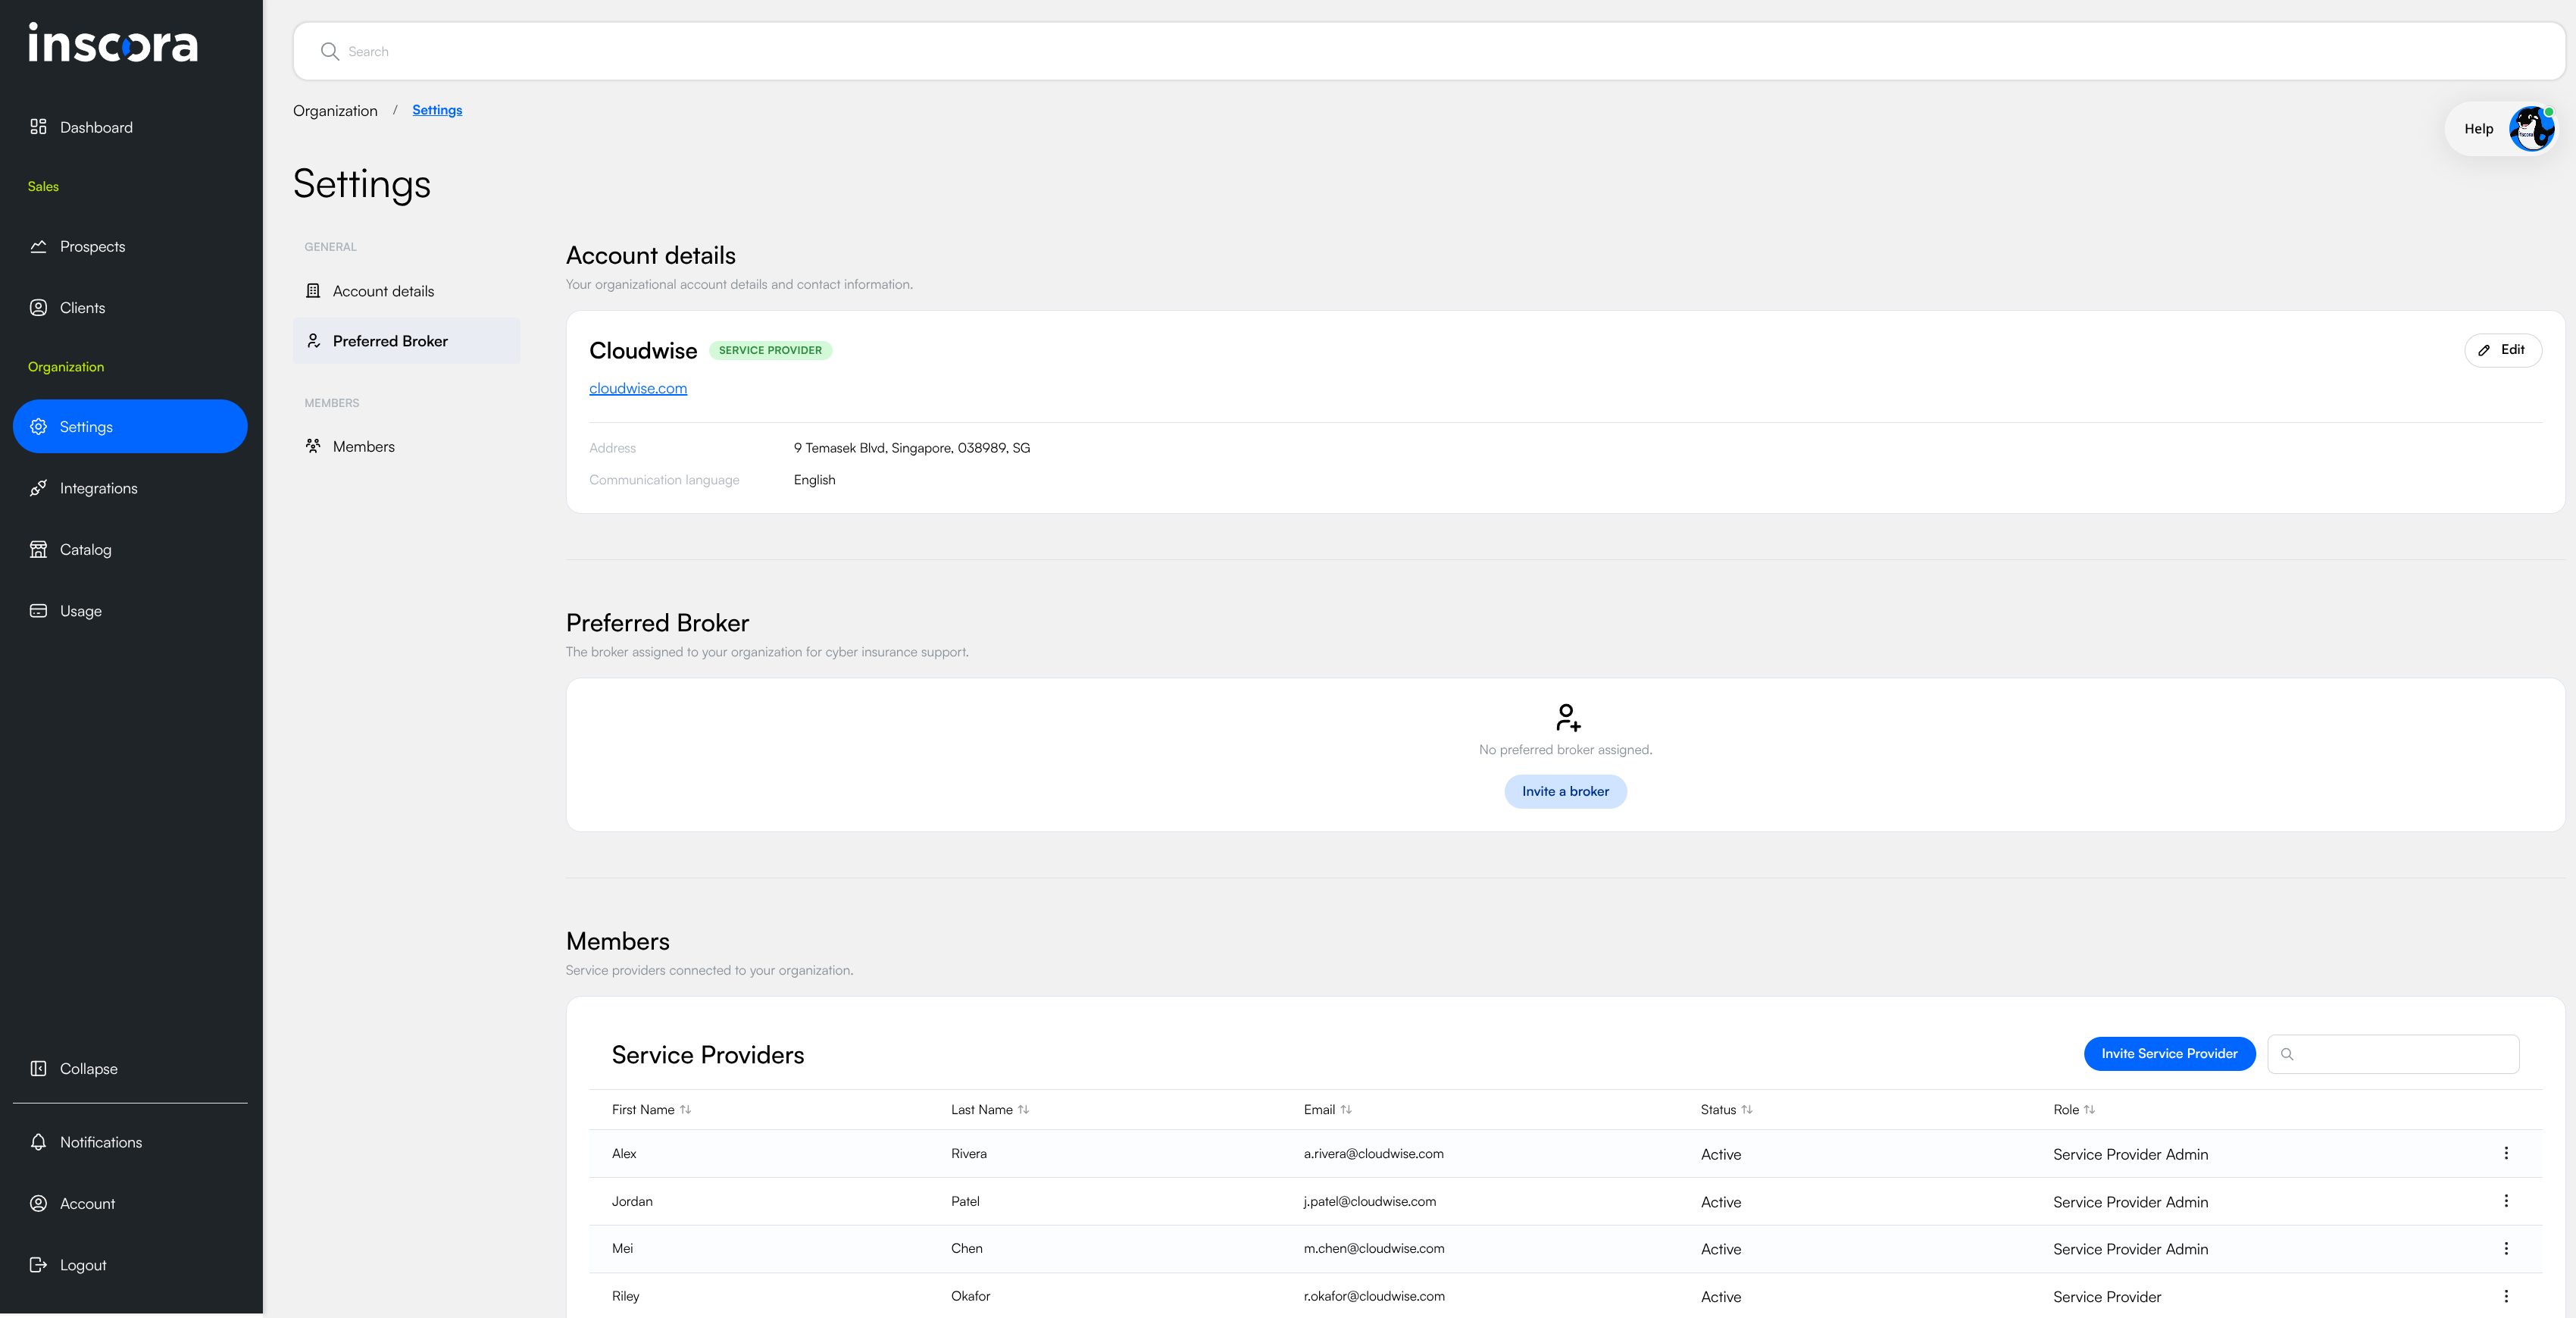
Organization Settings: the section list on the left, then Account details, Preferred Broker and Members on one page.
Account details
The Account details section contains your organization's profile information. This is what Inscora uses to identify your company across the platform. The section shows your name, website, address and communication language at a glance; use Edit to change any of the fields below.
Field | Description |
|---|---|
Organization Name | Your company name as it appears throughout Inscora. |
Website | Your organization's website domain. |
Address | Street address for your organization. |
Country / Province/State | Location fields, selectable from dropdowns. |
City / Zip Code | Additional location details. |
Phone Number / Alternate Phone Number | Contact numbers for your organization. |
Communication Language | The default language for your organization's communications in Inscora. When you or a team member creates a new client, the client's Communication Language is set to this value. Each client's language can be changed independently via the Client Edit panel (pencil icon at the top-right of the client card). The client's Communication Language controls the language of exported reports such as the Export Summary. |
Preferred Broker
If your organization works with a default broker partner, you can set them as your Preferred Broker. Once set, that broker becomes a ready-to-use option when you assign a broker during a cyber insurability assessment, instead of having to invite them each time.
Until you set one, the section reads No preferred broker assigned. Use Invite a broker to send the invitation: it asks for the broker's Agency Website and Broker Email, and nothing else. Once they accept, they show up here and become available in the broker assignment step.
💡 Inscora's Partner Broker is usually the stronger option. Setting a Preferred Broker makes sense when you already have a relationship worth protecting. Otherwise, use Inscora's Partner Broker: a hand-picked panel of cyber specialists who place this risk every day, know how underwriters read a CIPScore, and take a strong score to the carriers most likely to reward it with better premiums and terms. See Create & Finalize an Assessment for the side-by-side.
Members (Team Management)
The Members section holds the Service Providers table, which lists everyone in your organization who has access to Inscora. This is where you manage your team: invite new users, review who has access, and control their roles.
The table includes the following columns:
Column | Description |
|---|---|
First Name / Last Name | The team member's name. |
The email address associated with their Inscora account. | |
Status | Invited (invitation sent, not yet accepted) or Active (accepted and onboarded). |
Role | The user's role in the organization (see below). |
Actions | A three-dot menu with options to resend the invitation (re-sends the invite for Invited users, or triggers a password reset for Active users), change the user's role, or remove them from the organization. |
Roles
There are two roles for Service Provider users. The key distinction is visibility: standard Service Providers only see their own clients, while Admins see everything.
Role | Client visibility | Team management |
|---|---|---|
Service Provider | Can only view and work with clients assigned to them. The Dashboard, Prospects, and client list are scoped to their own accounts. | No access to Organization Settings or team management. |
Service Provider Admin | Can view and work across all clients in the organization, regardless of who they're assigned to. | Full access to Organization Settings. Can invite new team members, manage roles, and update the organization profile. |
ℹ️ Who should be an Admin? Give the Admin role to team leads or managers who need visibility across all clients and the ability to manage your organization's settings. Use the standard Service Provider role for team members who only need access to their own accounts. This keeps client data scoped to the people who need it.
Inviting a Team Member
- Click the Invite Service Provider button in the top-right corner of the Service Providers table.
- Enter the person's email address and select their role (Service Provider or Service Provider Admin).
- Click Submit. The person will receive an email invitation to join your organization on Inscora.
The new team member will appear in the table with an Invited status. Once they accept the invitation and finalize their profile, their status changes to Active and they can start using the platform. You can use the three-dot menu to resend the invitation if needed, change their role, or remove them.
ℹ️ Same pattern across portals. This user management approach (statuses, resend invitation, role changes, removal via the three-dot menu) works the same way for managing Client Users on a client page, and for managing Brokers in the Broker portal.
Usage
The Usage page is listed under the Organization section in the sidebar, alongside Settings and Integrations. When available, it will let you monitor your license status and invoicing details.
ℹ️ Coming soon. The Usage page is not available yet. Contact Inscora support for information about your license or billing.