
Add a Client
Step 1: Add a Client
All you need is a company name and a website domain. Once you hit Create, Inscora discovers related domains, scans the perimeter, and produces the first insurability results automatically.
How to Create a New Client
- Click the "Create Client" button on the Dashboard. You'll find it in the top-right area of the Clients table.
- Fill in the Create Client form. A dialog will appear with just two fields:
- Click "Create" to add the client. Inscora will immediately navigate you to the new client's page and automatically launch the first insurability scan in the background.
Note: What happens after you click Create?
As soon as the client is created, Inscora kicks off domain discovery and a perimeter scan from the website you entered. It finds subdomains and related domains, then evaluates the client's cyber insurability posture. No manual action needed. Results appear on the client page as the scan completes.
What You'll See: The Client Page
After creation, you land on the client's page. This is where you'll find everything about that client: CIPScore, insurance applications, assigned providers, users. The page has header cards at the top and tabbed detail sections below.
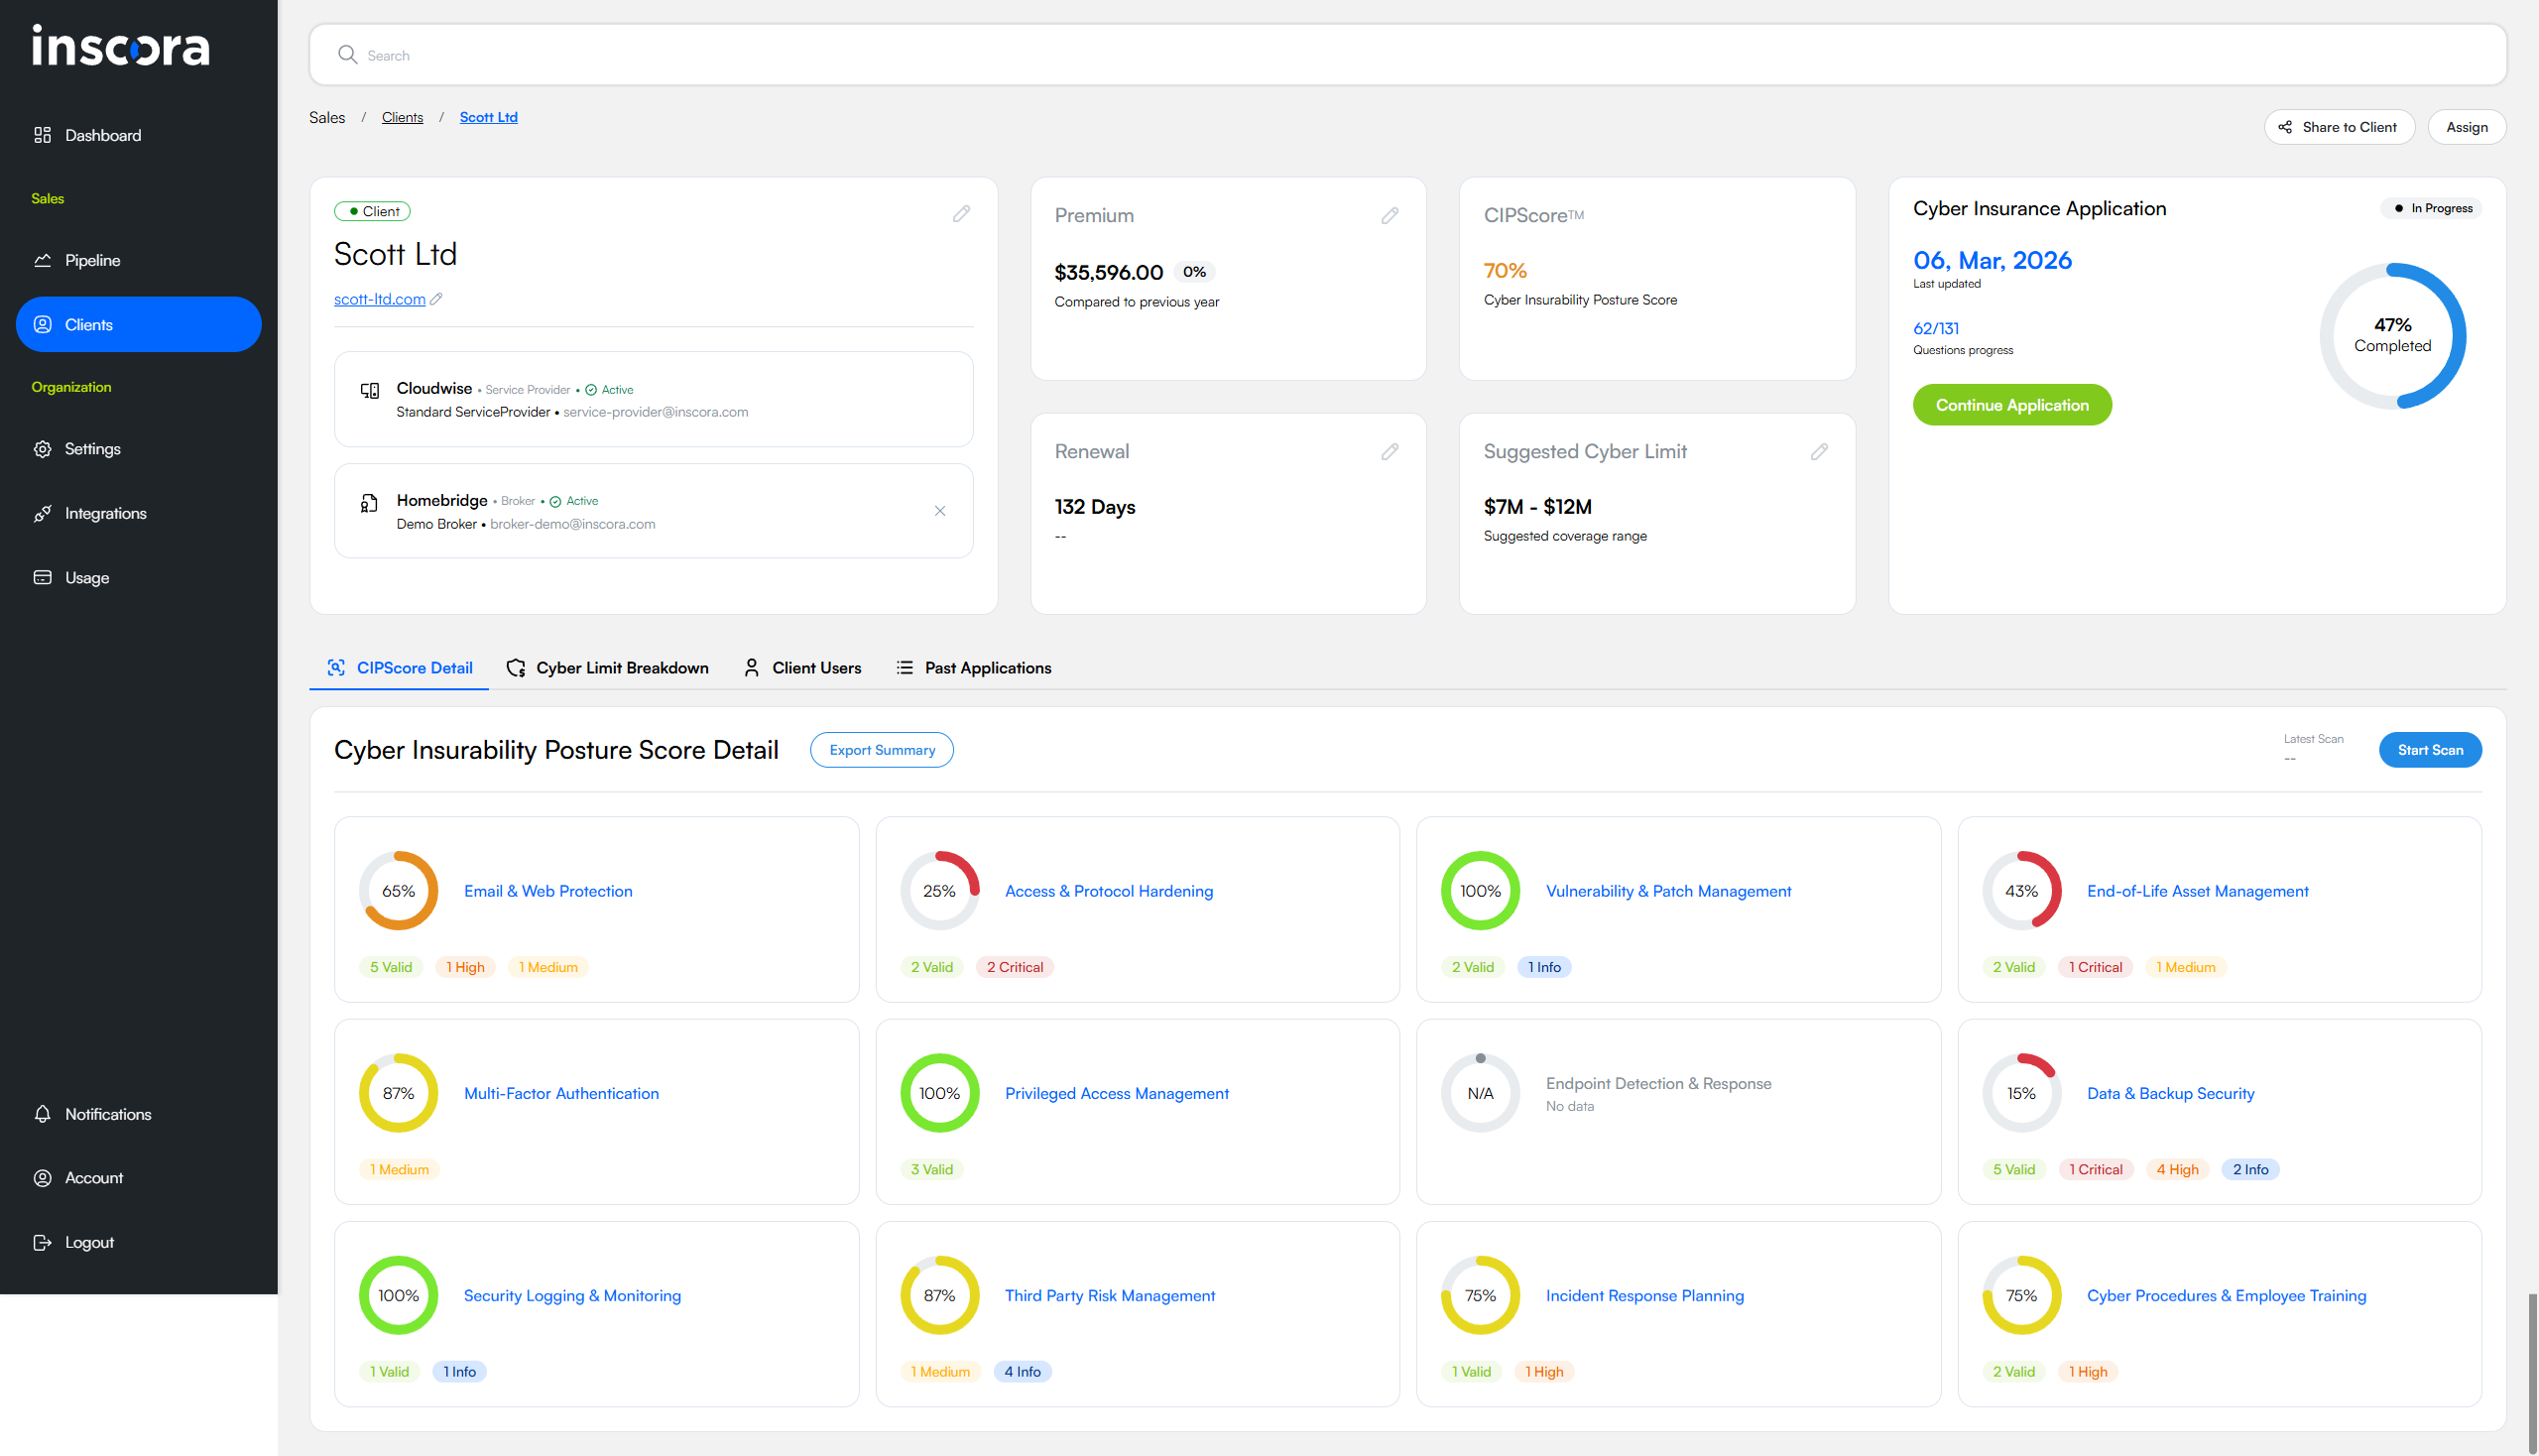
A client's page showing scan results, service provider info, premium tracking, and CIPScore breakdown.
Client Info & Assignments
The upper-left block shows the client's name and website. Click the pencil icon next to the website to open the Digital Asset Manager, which lists all the domains and IPs Inscora discovered. You can add or remove entries here if automatic discovery missed something the client owns.
Below the client info you'll see the assigned Service Provider and assigned Broker. For new clients, no broker is assigned yet. You'll assign one when you complete an assessment. For best results, use Inscora's Partner Broker - they specialize in cyber insurance and have access to the broadest range of carriers and products.
Premium & Renewal
The Premium card shows the client's known cyber insurance premium (editable), so you can track premiums over time. The Renewal card below it shows the policy renewal date. Together they give you a view of each client's insurance lifecycle.
CIPScore
The CIPScore card shows the overall Cyber Insurability Posture Score, a single percentage built from 12 control categories. From the perimeter scan alone, only some categories will have scores. The rest require client input through the cyber insurability assessment (a guided questionnaire you can drive from the platform).
Suggested Cyber Limit [BETA]
This beta feature helps determine the right coverage amount for a client. It uses the client's industry and CIPScore to compute a probable loss scenario: an estimated dollar amount the client might lose in a cyber incident, broken down by risk category. Inscora then suggests a cyber policy limit.
Cyber Insurance Application
The last header block. From here, the Service Provider can start a cyber insurability assessment, or a broker can initiate an application to take to insurance markets, using the CIPScore and assessment data gathered through the platform.
Detail Tabs
Below the header cards, four tabs let you dig deeper:
Tab | Description |
|---|---|
CIPScore Detail | Insurability scan results across all 12 categories, with individual scores and validations. See Understanding the Cyber Insurability Posture Score. Use the Explain button on any validation to get a full AI-generated briefing. |
Cyber Limit Breakdown | Probable loss scenario and recommended coverage limit (relates to the Suggested Cyber Limit card above). |
Client Users | Manage the individuals from this client's organization who have access to the platform. |
Past Applications | History of previous cyber insurability assessments and cyber insurance applications submitted for this client. |